
If you've ever been mesmerized by the haunting, melodic tones of a tongue drum and wondered if you could craft one yourself, you're in the right place. Steel tongue drum plans have become increasingly popular among DIY enthusiasts, musicians, and sound healing practitioners who want to create their own custom instruments without breaking the bank. Building your own tank drum isn't just about saving money—it's about understanding the physics of sound, connecting with the crafting process, and creating something truly unique.
In this comprehensive guide, we'll walk you through everything you need to know about tongue drum construction, from selecting materials to tuning your finished instrument. Whether you're a seasoned metalworker or a complete beginner, these DIY steel tongue drum plans will give you the knowledge to embark on this rewarding project. And if you find the process challenging, we'll show you how professional instruments from Healing Sounds can serve as both inspiration and reference for your build.
Understanding Steel Tongue Drum Construction
Before diving into your build, it's essential to understand how these fascinating instruments work. A steel tongue drum consists of a hollow steel body with carefully cut tongues of varying lengths and shapes. When struck, each tongue vibrates at a specific frequency, producing distinct musical notes. The relationship between tongue length, width, thickness, and the chamber size determines the pitch and sustain of each note.
The most common design features 8 to 11 tongues arranged in a circle or pattern around the top surface. The body acts as a resonating chamber, amplifying the vibrations and creating that characteristic ethereal sustain that makes tongue drums so captivating for meditation and sound therapy.
Materials You'll Need for Your DIY Build
Selecting the right materials is crucial for achieving a resonant, durable instrument. Here's what you'll need for your steel tongue drum construction project:
- Steel blank: A circular steel plate or shallow bowl, typically 1/8" to 3/16" thick, with a diameter between 10-14 inches. Higher carbon steel produces brighter tones, while mild steel offers warmer, more muted sounds.
- Propane tank (alternative): An empty 20-pound propane tank can serve as your starting material for a tank drum plan, though this requires additional preparation and safety considerations.
- Steel tubing or hollow section: For the side walls if building from a flat plate, creating the resonating chamber.
- Wood or rubber feet: To allow sound projection from the bottom opening.
- Finish: High-temperature paint or protective coating to prevent rust.
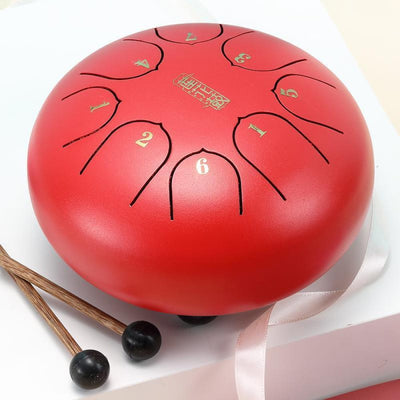
The quality of your steel directly impacts the final sound. While you can source metal from scrap yards or hardware stores, consider how a professionally crafted 6" Carbon Steel Tongue Drum, 11 Notes in C/D Major can serve as an excellent reference point for understanding proper material thickness and resonance before you begin cutting.
Essential Tools Required for Building a Steel Tongue Drum
Having the right tools will make your DIY tongue drum project significantly more manageable and yield professional results:
- Angle grinder or plasma cutter: For precisely cutting the tongues from your steel blank.
- Metal files and rasps: Essential for smoothing edges and fine-tuning tongue dimensions.
- Drill with step bit: To create the opening at the bottom of the drum.
- Welding equipment: If constructing the body from flat stock and tubing.
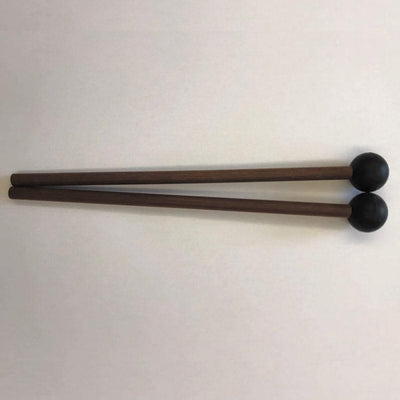
- Tuning equipment: Electronic tuner or tuning app, rubber mallets for testing.
- Safety equipment: Welding mask, gloves, eye protection, and hearing protection are non-negotiable.
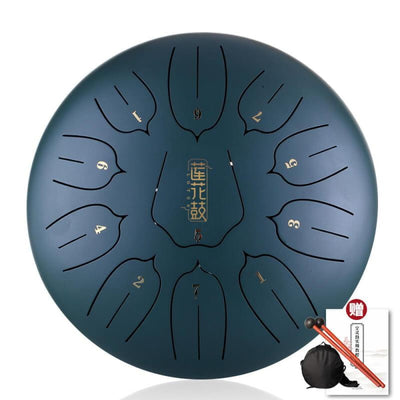
While professional instrument makers use specialized machinery, many successful DIY builds have been completed with basic shop tools. The key is patience and precision—the same craftsmanship that goes into creating our 14 Inch Titanium Steel Tongue Drum, C Major 11 Note for Meditation.


Step-by-Step Steel Tongue Drum Construction Process
Preparing Your Steel Surface
Begin by thoroughly cleaning your steel blank or propane tank surface. Remove any rust, paint, or coatings using a wire wheel or sandblasting. If using a propane tank, ensure it's completely empty and purged of all gas before cutting. Cut the tank to your desired height—typically 4-6 inches for the body depth.
Mark the center point and layout your tongue pattern. Common configurations include circular arrangements or flower patterns. The placement affects both aesthetics and acoustic coupling between notes. Use a permanent marker or scribe to outline where each tongue will be cut.
Cutting the Tongues
This is the most critical phase of your build. Using an angle grinder with a thin cutoff wheel, carefully cut along your marked lines. Cut slightly outside the lines initially—you can always remove more material, but you can't add it back. Leave the tongues attached at one end; this creates the spring-like mechanism that produces sound.

After cutting, use files to smooth all edges and refine the tongue shapes. Sharp edges can cause unwanted overtones and pose safety hazards. The goal is clean, smooth tongues that can vibrate freely without interference.

Tambour à langue en acier au carbone de 6 pouces, 11 notes en do/ré majeur
$79.99 $99.99
Start your tongue drum journey with this affordable 6-inch carbon steel model. Perfect for learning scales before building your own instrument.
Explore ProductTuning Your DIY Tongue Drum
Tuning is where your instrument truly comes to life—and where many DIY builders face their biggest challenges. Each tongue's pitch is lowered by removing material from the underside (making it thinner/flexible) and raised by removing material from the sides (making it shorter/stiffer).
Start with your lowest note and work upward. Use a rubber mallet to strike the tongue while checking your tuner. Remove small amounts of material at a time, testing frequently. A belt sander or file works well for this delicate work. Patience is essential; removing too much material will raise the pitch beyond your target.
Pro Tip: Keep a reference instrument handy during tuning. The 13-Inch 15-Note C Major Carbon Steel Tongue Drum provides an excellent benchmark for pitch accuracy and tonal quality as you refine your homemade creation.
Alternative Method: Building from a Propane Tank
Converting an empty propane tank into a tongue drum is one of the most popular DIY approaches for homemade tongue drum projects. The pre-formed dome shape provides excellent resonance, and the thick steel walls offer durability.
To begin, ensure the tank is completely empty and safely purged. Cut off the valve assembly and flatten the top surface where you'll cut your tongues. The curved surface actually enhances the acoustic properties, creating a warmer tone than flat-plate designs.
Many builders find that propane tank conversions require less welding and shaping than starting from flat steel, making them ideal for beginners. However, the thickness of tank steel (typically 3/16" or more) requires powerful tools and makes tuning more challenging than with thinner stock.
Professional Reference Instruments for Your Build

Experience professional sound quality with this titanium steel drum featuring 11 notes in C Major. An excellent reference for your DIY build. Learn more ➔

Compare your homemade creation to this premium 15-note carbon steel drum. Crafted from high-quality materials for exceptional resonance and durability. Learn more ➔
How Long Does It Take to Make a Tongue Drum?
For first-time builders, expect to invest 15-25 hours spread across several sessions into your steel tongue drum building project. Material preparation and cutting typically take 4-6 hours, while tuning can require 8-15 hours of careful, iterative work. Finishing and coating add another 2-4 hours plus drying time.
Experienced metalworkers might complete a basic build in 8-12 hours, but rushing the tuning process often results in compromised sound quality. Many builders find the process deeply meditative—the same mindful approach that makes playing these instruments so rewarding applies to crafting them as well.

Common Challenges and Solutions in Tongue Drum Construction
Even with the best steel tongue drum plans, builders often encounter challenges:
Uneven tuning: If some notes sound muted or have short sustain, check that tongues aren't touching the chamber walls and that cuts are clean and complete.
Metal fatigue: Over-filing during tuning can weaken tongues. Work slowly and test frequently.
Rust prevention: Steel drums require protection. Use high-temperature paint or specialized coatings designed for metal instruments.
Inconsistent tone: This often stems from uneven material thickness. Quality steel stock pays dividends in final sound quality.

Conclusion: The Reward of Building Your Own Tongue Drum
Creating your own steel tongue drum is a journey that combines technical skill, artistic vision, and sonic exploration. While DIY steel tongue drum plans offer an affordable entry point into the world of tongue drums, the process requires patience, proper tools, and a willingness to learn from trial and error.
If you're drawn to these instruments for meditation, sound healing, or musical expression, building your own creates a deep connection to the instrument. However, not everyone has the time, tools, or workspace for metal fabrication. That's where Healing Sounds' collection of professionally crafted tongue drums offers the perfect solution—delivering concert-quality instruments that benefit from expert craftsmanship and precision tuning.
Whether you choose the DIY path or invest in a professionally made instrument from Healing Sounds, the therapeutic benefits of tongue drum music await. Start your sound journey today.
Frequently Asked Questions About Steel Tongue Drum Plans
To make a steel tongue drum, you'll need a steel blank (1/8" to 3/16" thick, 10-14" diameter) or an empty propane tank, cutting tools like an angle grinder, metal files for finishing, welding equipment if building from flat stock, and protective coating to prevent rust. Optional materials include wood or rubber feet for sound projection and high-temperature paint for finishing.
To tune a DIY tongue drum, remove material from the underside of the tongue to lower the pitch, or from the sides to raise it. Work slowly using a belt sander or file, testing frequently with a tuner. Start with your lowest note and work upward. Removing material from underneath makes the tongue more flexible (lower pitch), while shortening the tongue by filing the sides makes it stiffer (higher pitch).
Yes, empty propane tanks are popular starting materials for DIY tongue drums. The pre-formed dome provides excellent resonance. Ensure the tank is completely empty and safely purged of all gas before cutting. Cut off the valve assembly and flatten the top surface where you'll cut your tongues. Propane tank steel is typically thicker (3/16"+), requiring more powerful tools but producing a durable instrument with warm, resonant tones.
Essential tools include an angle grinder or plasma cutter for cutting tongues, metal files and rasps for smoothing edges, a drill with step bit for the bottom opening, welding equipment if constructing from flat stock, and an electronic tuner for pitch accuracy. Safety equipment is crucial: welding mask, gloves, eye protection, and hearing protection. Rubber mallets are needed for testing tones during the tuning process.
For first-time builders, making a tongue drum typically takes 15-25 hours spread across several sessions. Material preparation and cutting take 4-6 hours, tuning requires 8-15 hours of careful work, and finishing adds 2-4 hours plus drying time. Experienced builders might complete a basic drum in 8-12 hours. The tuning phase is the most time-consuming, requiring patience and iterative adjustments to achieve accurate, resonant notes.